Water based Table Tennis Glue guide - the pitfalls and tips
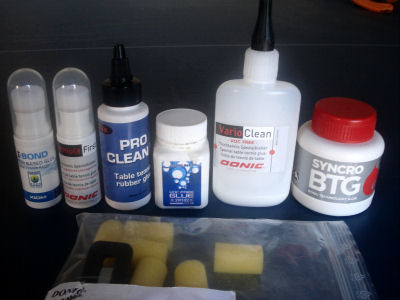
Although water based glued are much safer, they are nowhere near as easy to use as the old VOC-based glues. I have tried many of the glues on the market, and most suffer from one or more of these problems:
- The glue 'balls up' (little solid particles appear) when you spread it onto the surface, making the surface uneven.
- The glue does not stick well enough.
- The glue sticks too well enough, making it to hard to remove (damages rubber and/or blade) when it needs to be replaced.
- The glue hardens in the bottle and/or on the applicator, which makes it really hard to spread evenly, and also wastes a lot of glue.
- The glue is too hard to remove from the blade and/or rubbers, making it hard for the further applications.
Here are some tips on gluing your rubber with water based glue. Although it uses the "Donic Vario Clean" rubber, most water based glues are quite similar, and the pitfalls and tips are still applicable. This guide assumes a sheet of inverted rubber with sponge. For pimple rubbers without sponge requires some extra steps which I'll describe in another article.
Preparation:
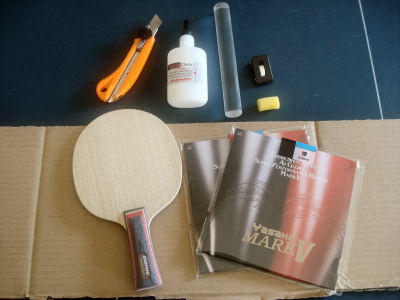 What you need for the complete glue are (1)glue + applicator, (2) a roller (or other rigid cylinder share object), (3) a sharp cutting knife (box-cutter, scalpel or razor-blade) and (4) a large piece of thick carton for cutting.
1. Remove rubber and blade from packets. For rubbers sheets without plastic sheets attached to the surface, take care handling the delicate surface. Usually these come with paper sheets, so it's best to leave these to ensure you don't rub the surface, or get glue on other chemical on there from your grubby fingers.
Applying the glue:
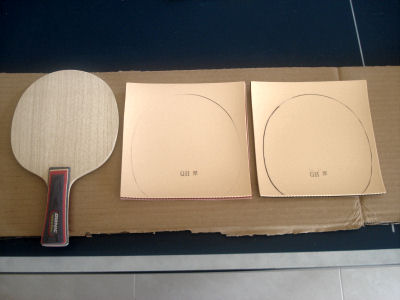
- 2. Lay each rubber sheets on your blade, turn it over and draw a rough outline of your blade on the sponge. This saves glue as not the whole sheet needs to be glued.
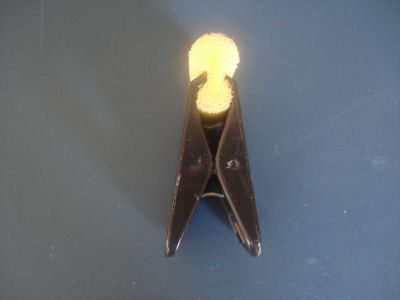 3. Put the little applicator sponge halfway into the clamp. Only half needs to be used for one gluing session, and you can use the other half next time.
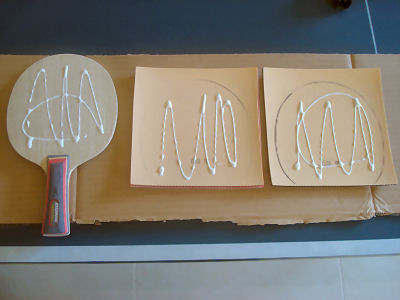
4. Squirt glue on one side of the blade, and on both rubbers. Put a little more on the blade, as we'll spread the glue there first, and the applicator sponge tends to absorb some of the glue when you start spreading.
Spread the glue on the blade immediately and you should only have a thin layer on the blade, as the water in these water based glues is no good for the wood, so you don't want to give it time to soak into the wood.
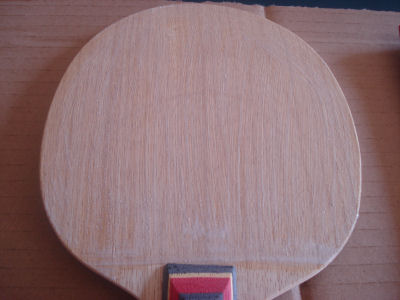 5. Spread the glue on the blade surface. First spread it roughly to cover most of the area, then go around the edges (and the line above the handle) and make sure they're covered, as this is where it's most likely to come loose first. Once completely covered, gently brush over the surface in straight lines to make sure the glue is spread evenly. Slight ridges don't matter much as the glue tends to dry virtually flush, but make sure there is no excess glue in places.
TIP: Make sure you put enough glue on there to cover the whole surface. If you need to rub hard to get it to cover the surface, you have not applied enough glue, and you might cause the glue to 'ball up', which means you need to start again.
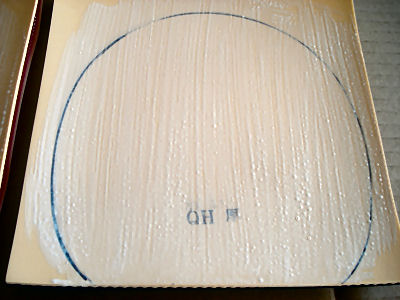
6. Repeat the same for both rubbers. Cover the surface within the lines and up to about 5mm outside the lines to ensure the whole contact surface is covered.
You'll see some tiny little glue bubbles and ridges (pictured left) that requires a bit more brushing to smooth it out, but even these dry virtually flush, so it won't affect the finish of the job much. Just smooth it out as much as possible, by going over it several times. If the sponge is too wet (too much glue on there) squeeze it out somewhere and then brush over the surface again to make it smoother.
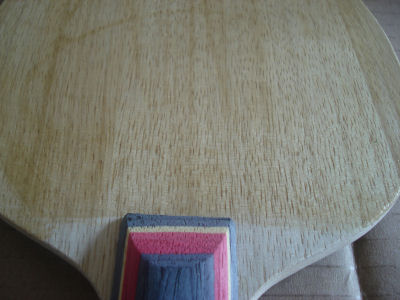
7. Wait for all surfaces to become completely clear. Usually this takes less than 5mins, but on really cold or humid conditions it could take a little longer. To speed it up you can blow a fan over it.
The blade always dried first, as the some of the moisture will soak into the wood, whereas it does not tend to soak into the sponge.
TIP: Although there's a minimum time you need to wait for the glue to dry, there really is no maximum time as you can leave it for hours, and it will still stick together quite well.

Attaching the rubber
8. This steps requires some extra attention, as this is a contact based glue, and as soon as firm contact is made, the sheet cannot be moved, so you must get it right the first time, or you'll need to start again.
 (a) Hold the sheet with fingers spread on the edges on each side.
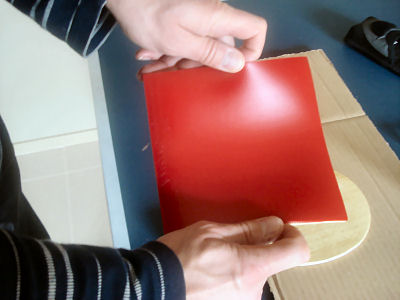 (b) Bend the sheet outwards slightly by pulling up with the fingers and doming the middle down just slightly. This is especially important if the sheet has a bit of a dome already.
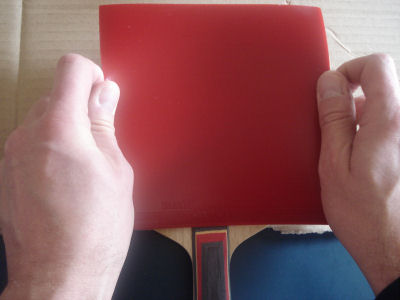 (c) Hold the sheet above the blade, and line up the bottom of the sheet with the top of the handle. Make sure it's roughly central and not too far left or right.
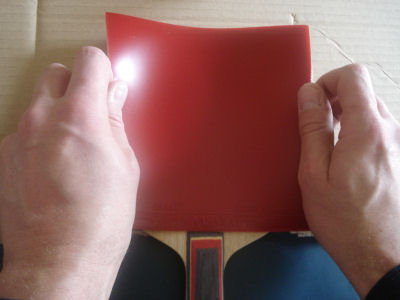 (d) Lay down the sheet at the contact point just above the handle first, and then lay down the central bit (from top of handle to tip of blade) of the rubber first.
 (e) Now gently put down the rest of the sheet by releasing the bend in the sheet, and without pushing down on any part.
At this point the rubber is attached mainly in the middle line, and still fairly lose towards either end as we have not pushed down there yet.
 9. If the sheet came with no plastic protection sheet, cover the sheet with the paper it came with.
Get your roller (or a wine bottle), put in down on the central bit first, and very gently roll towards one edge.
If the sheet still had a strong upwards dome on both sides of the central section, lift up the end slightly while you're rolling towards the edge, which will ensure you get no bubbles underneath. Repeat and roll towards the other edge.
 Now you can roll harder to make sure all parts of the rubber are down flush. There should be no bumps or bubbles, or you'll need to start again.
Some people prefer to attach the rubber just above the handle, and then use the roller to 'roll' the rubber onto the rest of the blade. I'm sure this will work OK too, but I prefer the method as described.
Cutting:
Water based glue solidifies and is no longer sticky once it's it's dry, so during cutting we must make sure we don't lift any of the rubber off the blade, as it will not stick back down again. I always prefer to use a knife, as scissors can too easily lift the edge of the rubber.
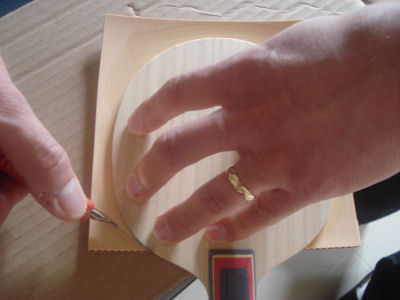 10. Get some carton that's at least 2mm thick, and put this underneath the blade. Put the bat down with the rubber on the carton. Leave the paper protection sheet on there, as we can cut right through this as well.
Push the bat down hard onto the carton, and with a very sharp knife (like a razor blade, scalpel or box-cutter knife, start cutting the rubber near one end of the handle, and run the knife along the edge of the blade.
Tip: Do not try and cut through the whole rubber all at once, since the chance of jagged edges or tearing will be much higher. Take several passes instead until the rubber has detached completely.
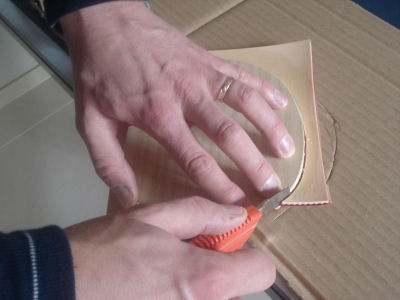 Cut off all the excess rubber around the edges.
Tip: Put the handle of the blade over the edge of the table, as I would not want to snap the blade while I'm pushing down onto the blade face while cutting. This is particularly important for balsa blade who are generally weaker.

Great job, one side completed!
Put the paper cover back on so that we can do the other side.

11. Spread the glue on the other side of the blade, wait for it to dry and repeat from step 8.
Tidying up:
 12. You'll probably notice some little balls of glue along the edge of the bat. This is from rubbing the knife edge against the glue bond while cutting.
Do not just pull little bits of glue from the edges, as you'll easily pull the glue from within the bond between the rubber and blade.
What you do it sqeeze the bat hard between your fingers at the point where the glue ball sits, so that it just breaks off clean when you pull it off.

13. At this point it's usually a good idea to clamp the bat, although it's not really necessary as the glue is already dry, and any further pressure is not going to help much. However I still like to do this, as it might give the bond a little extra strength.
You can make a home made clamp as pictured, or you can buy a brand name one, or you can just use a big pile of books. Anything that can give a decent amount of pressure to the whole surface is sufficient.

14. You can add edge tape if you wish, to cover up the evidence of a bad job, but it's not necessary. and purely for aesthetic purposes.
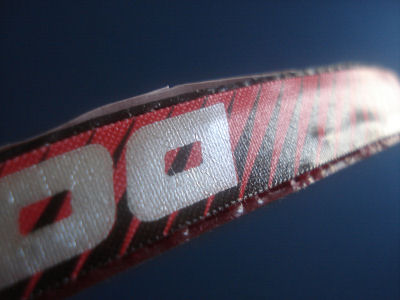
I like to use an edge tape that's wide enough to cover the blade and most of the rubber and it provides the neatest finish, but if you change rubbers regularly you can use one that just wide enough to cover the blade, or not bother at all.
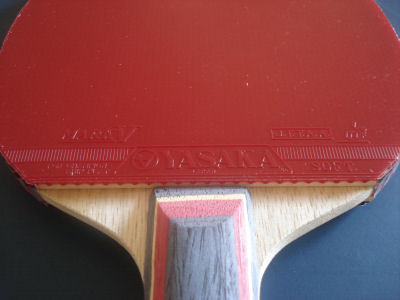
Voila! The job is finishes!
Starting again:
If you do stuff up, because of bad alignment or bubbles, it's best to start from scratch. Gently pull the rubber completely off the blade. The glue can be rubbed off quite easily from both the blade and rubber with your fingers. Make sure the surface is completely clean before you start again.

Article and copyright by: haggisv




 What you need for the complete glue are (1)glue + applicator, (2) a roller (or other rigid cylinder share object), (3) a sharp cutting knife (box-cutter, scalpel or razor-blade) and (4) a large piece of thick carton for cutting.
 3. Put the little applicator sponge halfway into the clamp. Only half needs to be used for one gluing session, and you can use the other half next time.
 5. Spread the glue on the blade surface. First spread it roughly to cover most of the area, then go around the edges (and the line above the handle) and make sure they're covered, as this is where it's most likely to come loose first. Once completely covered, gently brush over the surface in straight lines to make sure the glue is spread evenly. Slight ridges don't matter much as the glue tends to dry virtually flush, but make sure there is no excess glue in places.


 (a) Hold the sheet with fingers spread on the edges on each side.
  (b) Bend the sheet outwards slightly by pulling up with the fingers and doming the middle down just slightly. This is especially important if the sheet has a bit of a dome already.
  (c) Hold the sheet above the blade, and line up the bottom of the sheet with the top of the handle. Make sure it's roughly central and not too far left or right.
  (d) Lay down the sheet at the contact point just above the handle first, and then lay down the central bit (from top of handle to tip of blade) of the rubber first.
  (e) Now gently put down the rest of the sheet by releasing the bend in the sheet, and without pushing down on any part.
  9. If the sheet came with no plastic protection sheet, cover the sheet with the paper it came with.
 Now you can roll harder to make sure all parts of the rubber are down flush. There should be no bumps or bubbles, or you'll need to start again.
  10. Get some carton that's at least 2mm thick, and put this underneath the blade. Put the bat down with the rubber on the carton. Leave the paper protection sheet on there, as we can cut right through this as well.
 Cut off all the excess rubber around the edges.

 12. You'll probably notice some little balls of glue along the edge of the bat. This is from rubbing the knife edge against the glue bond while cutting.


